
Stance and guard
Article in 60 seconds
Got somewhere to be? Watch a 60 second video summary.
Boxing foundations
If boxing were a house, stance, and guard would be the foundations. It’s the platform that we build everything else upon. A solid stance provides mobility, balance, and power. An effective guard defends the head and body.
When teaching this to clients, I use the FUSED acronym:
F — Fluid
U — Up
S — Steady
E — Explosive
D — Down
This divides your body into a bottom and top half. A steady bottom half generating explosive power. A top half directing that power to the target.
Stance
You can trace the modern boxing stance back millennia. There are wall paintings depicting boxing that date back to the Bronze Age (1).
Your stance may differ depending on stature, physical attributes and skill level. Let’s keep it simple for now — the main difference in stance depends on your dominant hand.
Right-handed — you are usually an orthodox boxer.
Left-handed — you are usually a southpaw boxer.
This rule is not hard and fast. Many right-handers have boxed from a southpaw stance, and vice-versa. Some elite fighters switch stance in-contest. Get a feel for which feels more comfortable. This might take a while so don't paint yourself into a corner. Your stance will feel a bit awkward at first, but it will become second nature in no time. To help us in these early stages, we will use a visual guide.
If you are working on a tiled or laminate floor, pick a straight line. If not, you can mark a temporary line using decorator’s tape.
Relax! It’s natural to feel tense when you are learning something new. But hey, this is fun — unwind and enjoy it.
Close your eyes and take long, deep breaths. Get loose but stay focussed.
Imagine that your arms and shoulders are full of hot, molten lava. Shake them out and visualise that lava draining away, dripping from your fingertips. See it pooling around your feet, soon to detonate as explosive power.
Open your eyes and place your feet shoulder-width apart on either side of the line.
Place your feet shoulder-width apart on either side of your line.
If you are right-handed to take a step forward with your left foot. Right foot forward if you are a leftie.
Place your big toe on the line.
Adjust your lead heel so that your foot is at a 45-degree angle.
Adjust your rear heel, so that’s that it is on or near the line.
Your rear heel should flare out more, at an angle closer to 90 degrees.
Your lead toe should be in approximate alignment with your rear heel.
Flex your knees and feel your weight drop into your legs. Feel the connection to the floor. Your weight should feel even on the lead and rear foot, with a slight emphasis to the rear foot. Make sure your chin is behind your lead knee.
Lift your rear heel off the ground. You should feel your body weight pushing through the arch in that foot, down into the floor.
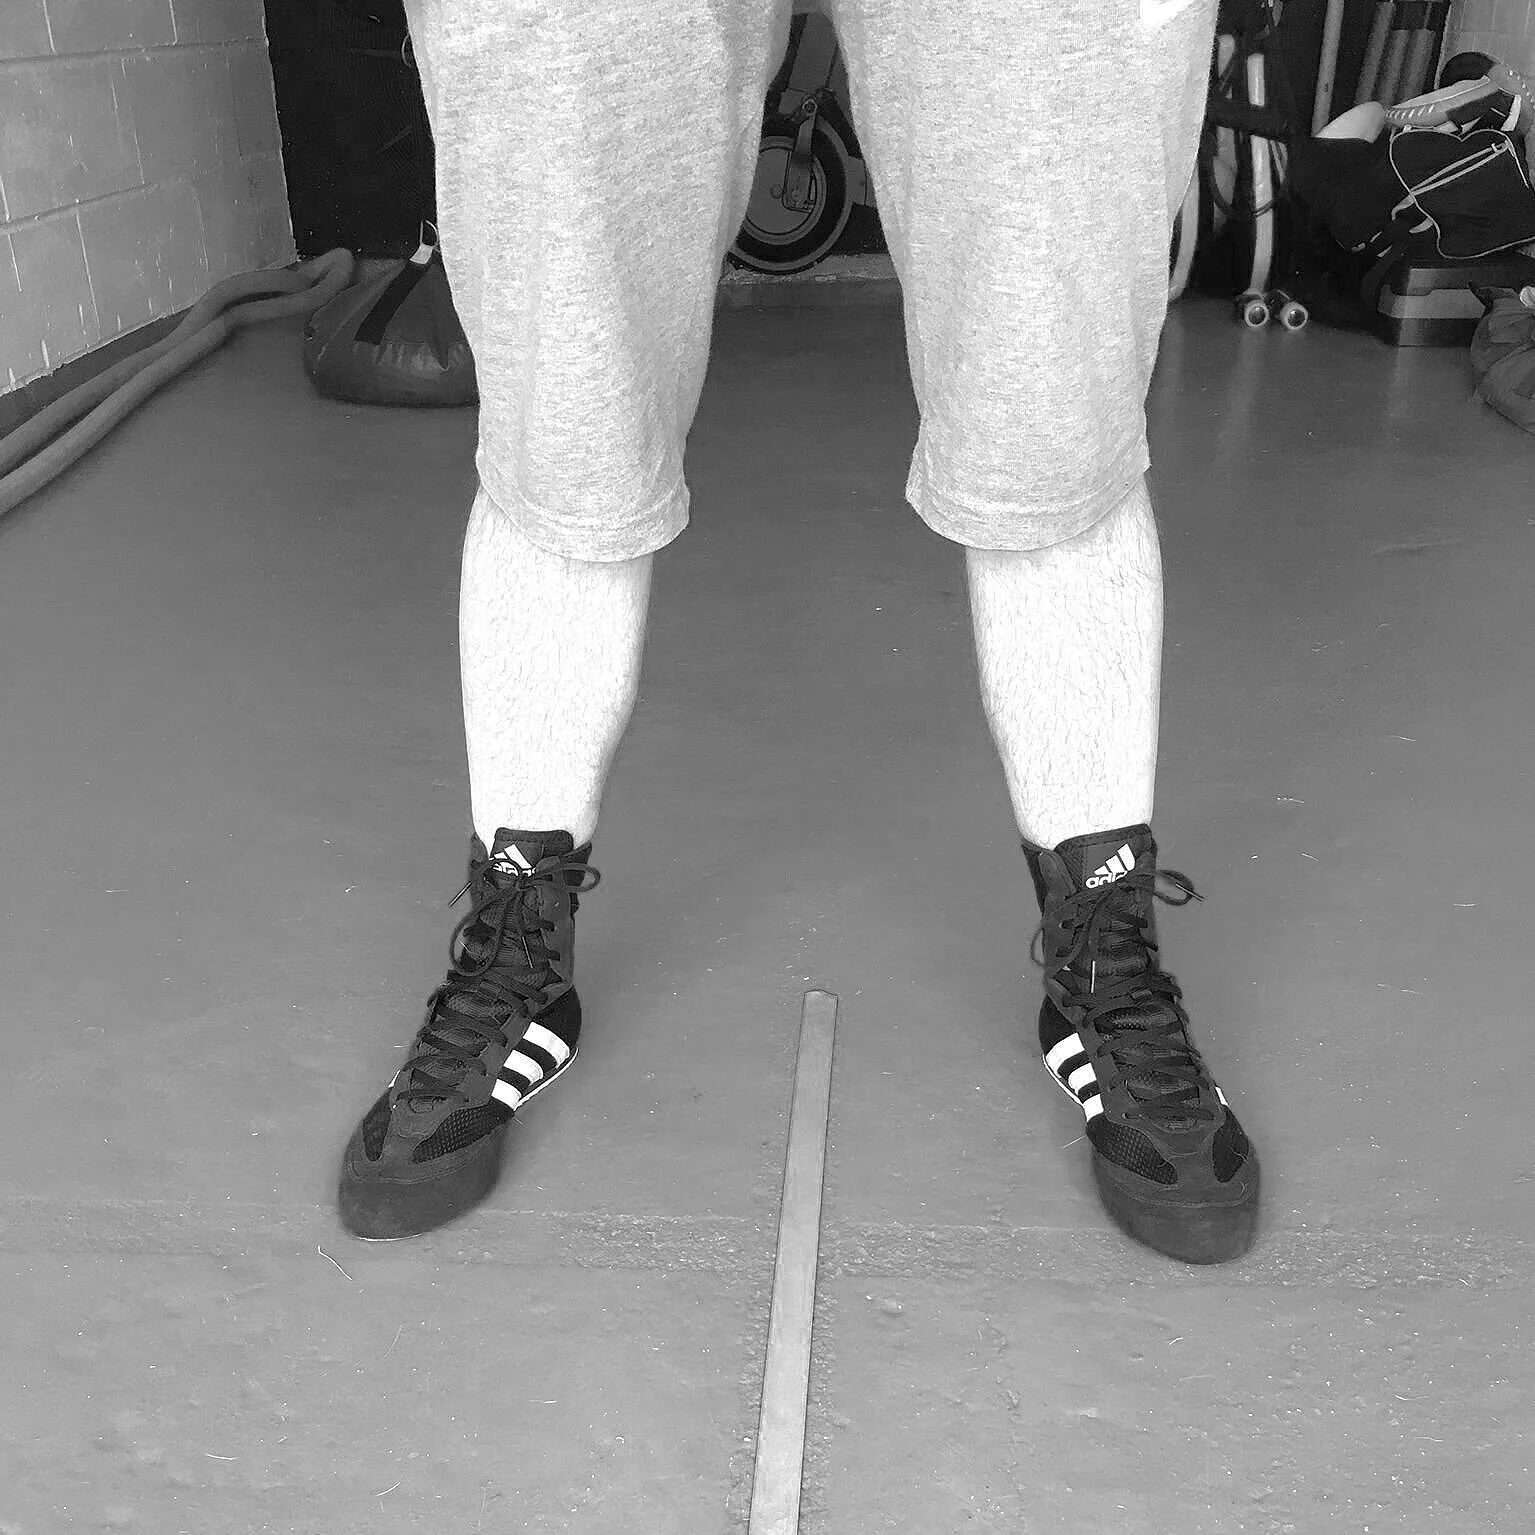
Pause for a second. How does your balance feel? If you have a training partner, ask them to give you a slight push from different angles. If your stance is solid, you should be able to resist and stay steady. Stay relaxed. Take a look down at your feet. They should look something like this.

Align your lead big-toe to your rear heel.
I call this the base box. If you were to chalk a line around the perimeter of your feet, you should have a rectangular shaped box. Don’t worry if this isn’t exact, as long as you understand the concept of the box. You will adapt a stance that fits your style over time.
If your feet are too close together or too far apart, balance, mobility, and power suffers. The same goes for the distance between front and back foot. Too close together or too far apart and the same rules apply. If you shuffle your feet so that they are both in line, you will notice that the box shape has gone. So has your balance. Ask your partner to give you a little shove, and you will get the picture.
Take a few minutes break then practice getting back into your stance. Get comfortable with it. Flex the knees, drop the weight. Practice moving your body weight, shifting it to the lead and rear foot. When you feel comfortable and in control as your partner pushes you, we can move on to the guard.
Guard
Take another glimpse into history — to Roman gladiators — and you will see a prototype guard. The lead hand probes, distracts and parries with a shield. This sets up decisive attacks with the sword in the rear hand. That this model has survived so long tells you about its efficacy. The side on stance reduces the surface area that an opponent can target. So, think of yourself as that gladiator. Don't give your opponent any free shots.
Stay relaxed. Shake out any tension from your arms and shoulders. If it helps, use our visualisation trick again. Don’t clench your hands.
Get into your stance.
Turn your lead shoulder towards your imaginary opponent.
Tuck your chin downwards towards your chest, looking through your eyebrows.
Make fists but keep the hands relaxed, thumbs covering index and middle fingers.
Hold your hands high to guard your face. Position your lead arm at eye level, bent at an angle between 90 and 120 degrees. Tuck your lead elbow in, two to three inches away from your stomach. Hold your rear hand close to your chin, elbow tucked in guarding your stomach.
Here's a perfect opportunity to use a mirror. Get comfortable in your stance and guard and critique what you see.
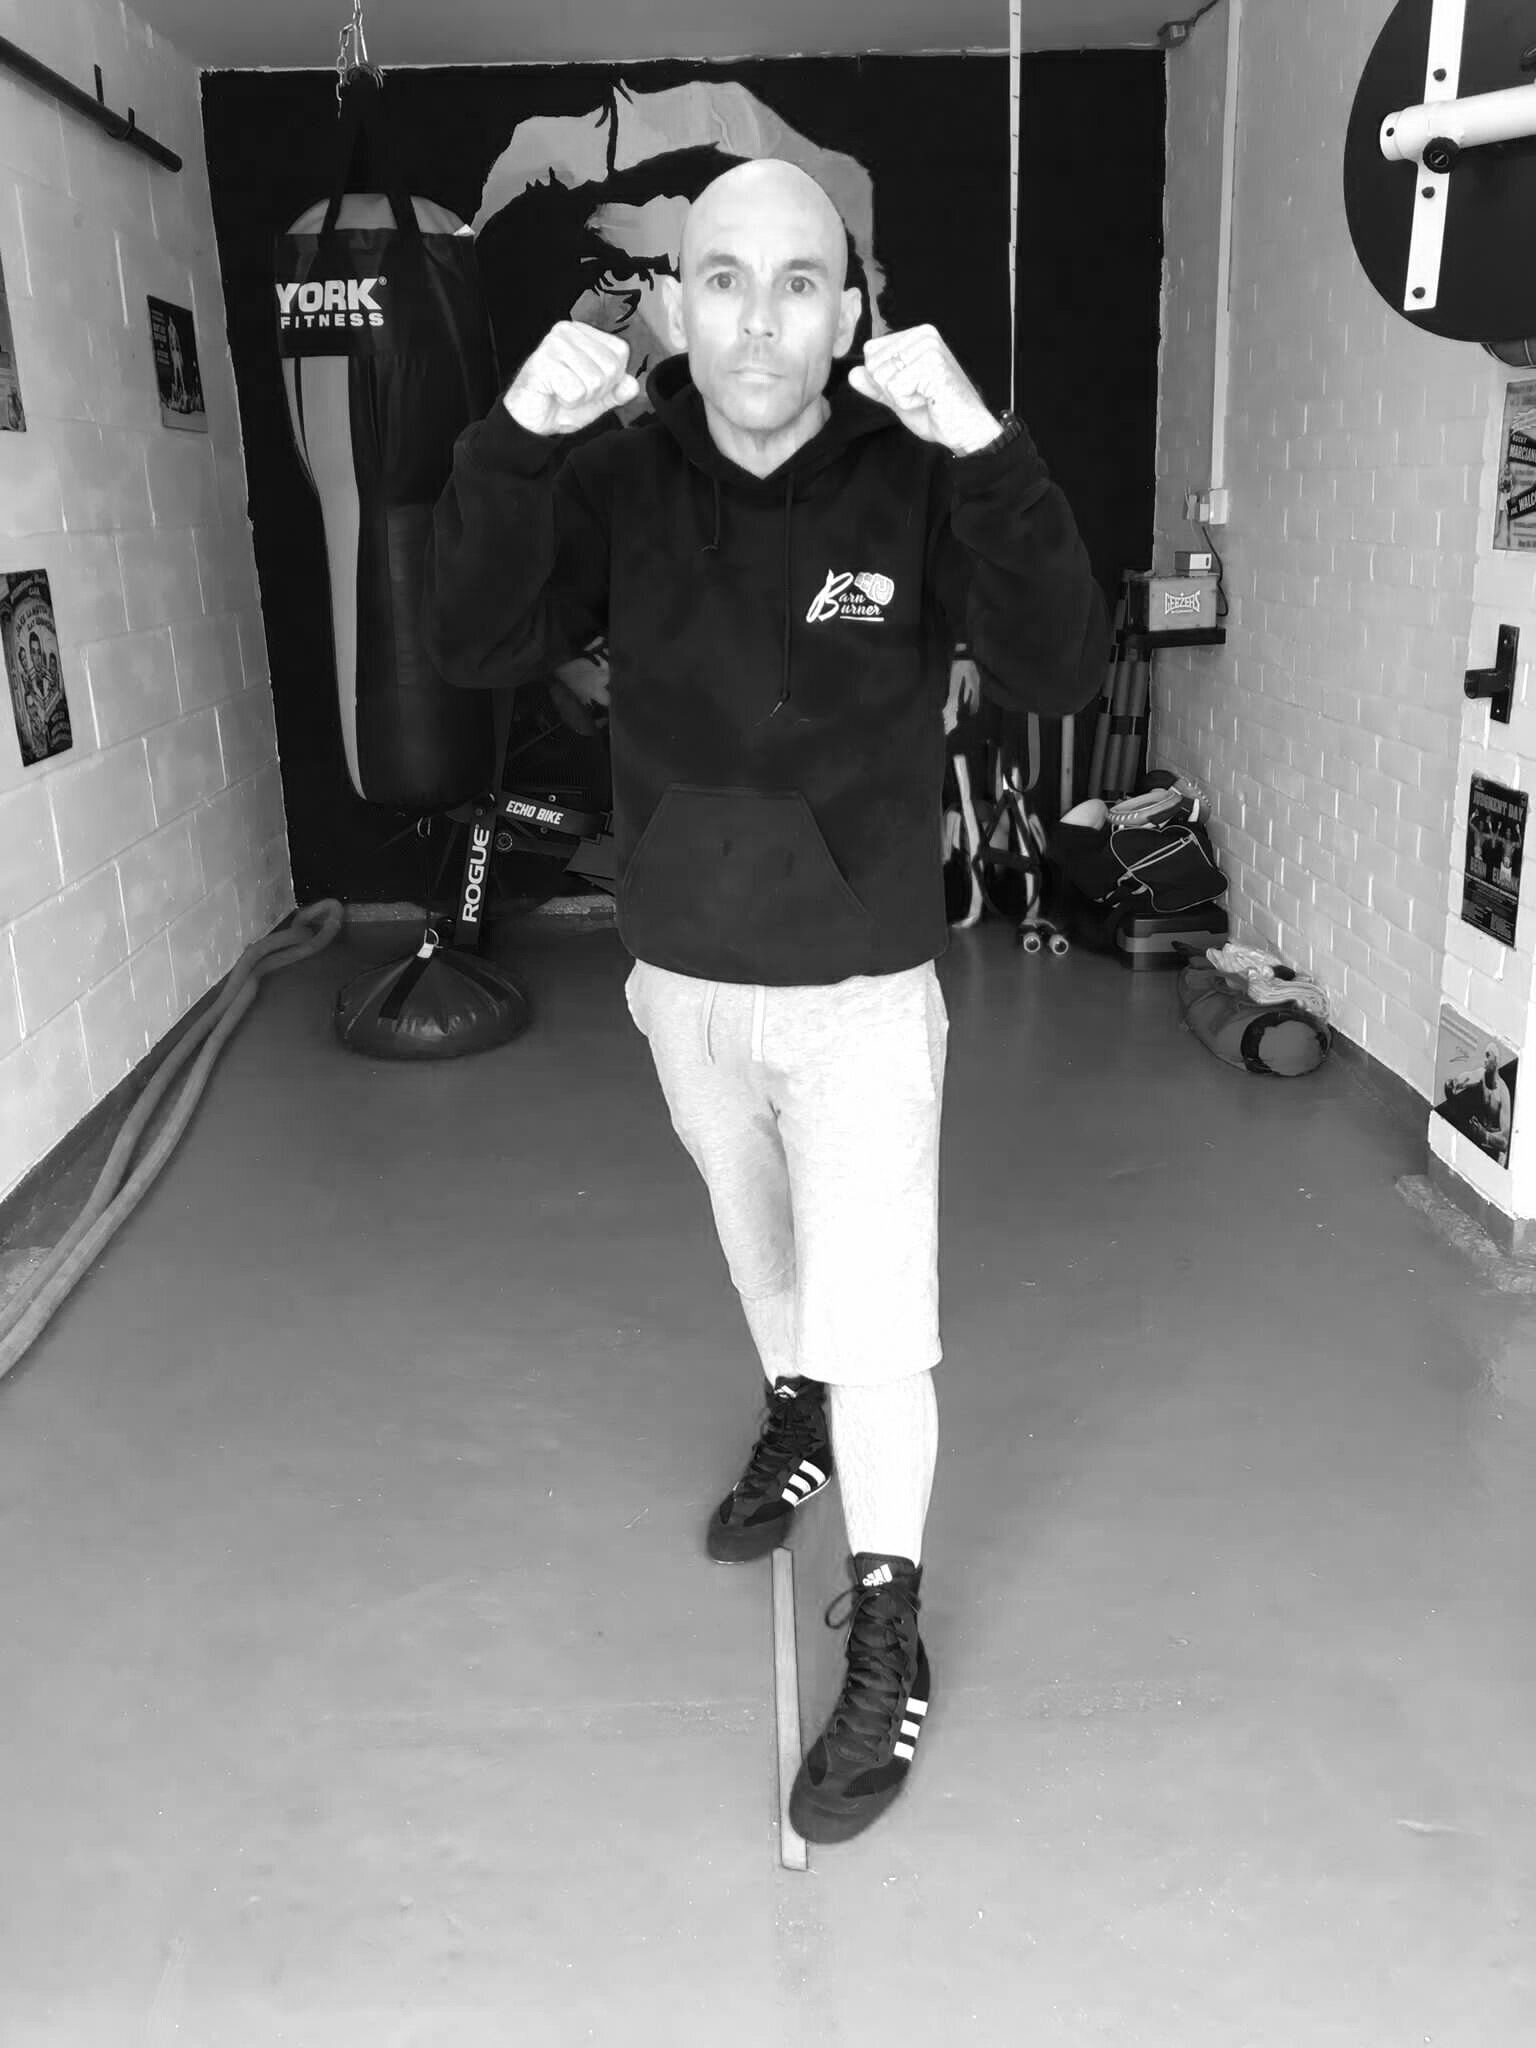
It should look something like this:
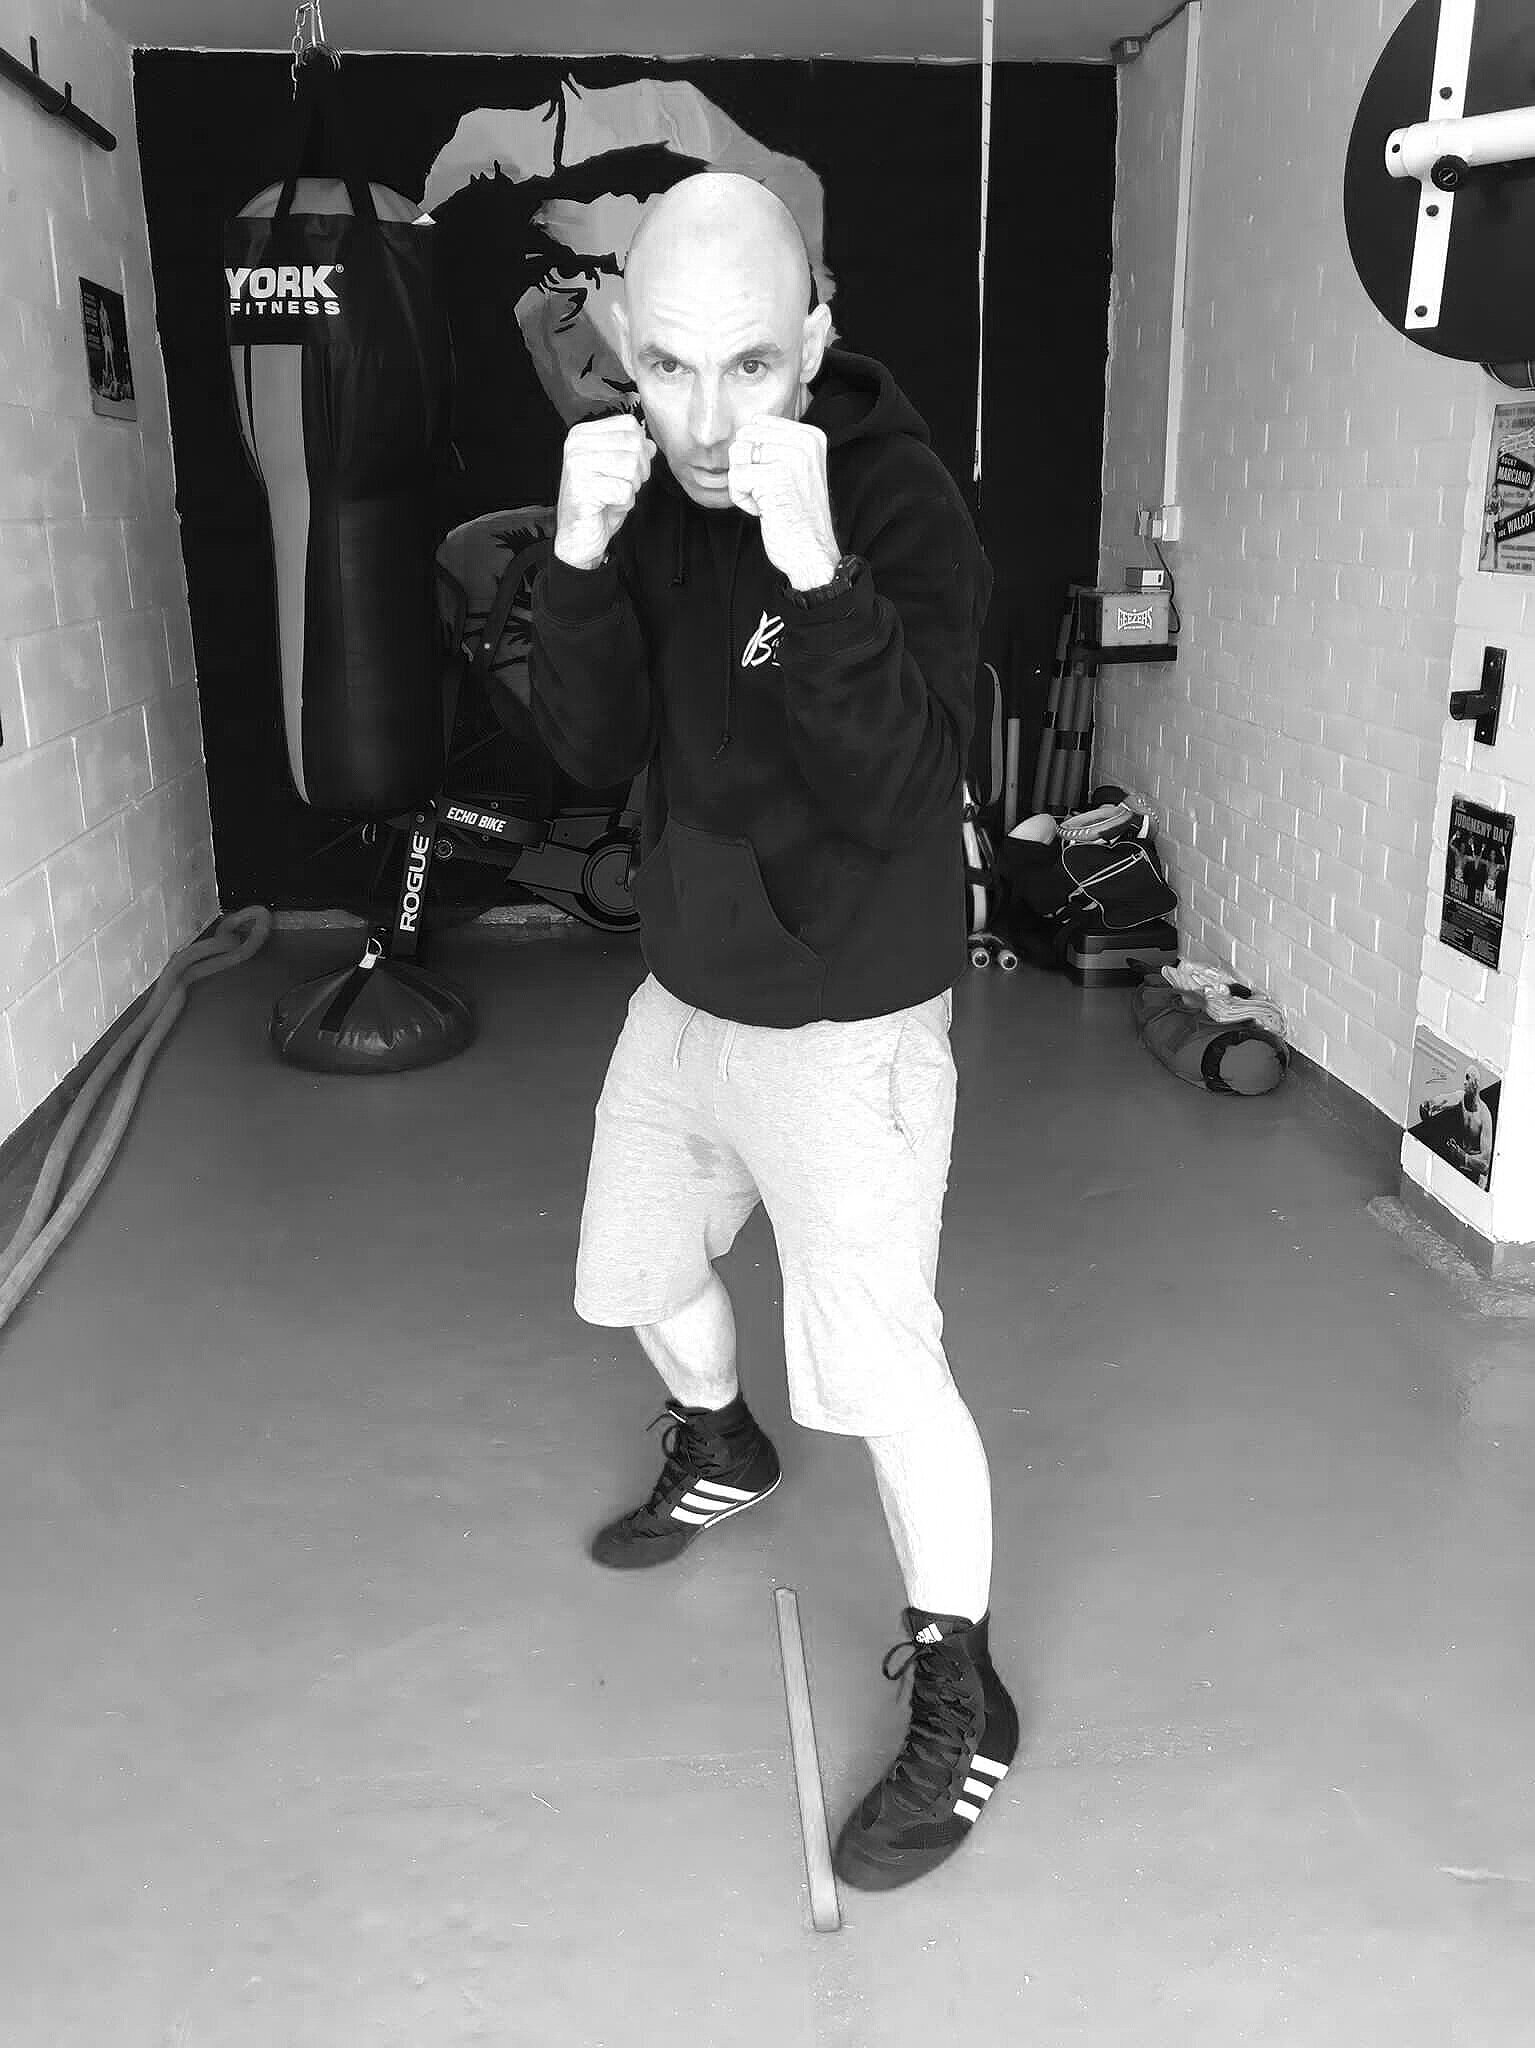
Stance and guard — front view.

Stance and guard — side view.
Concentrate on your:
chin — keep it down and behind your lead knee
hands — keep them up, protecting your face
lead shoulder and hip— point them forward to reduce target area
elbows — tuck them in to protect your body
knees — flex them to gain traction with the floor
rear heel — keep it raised off the floor
balance — even out weight to your lead and rear foot
As a further guide, it's helpful to see how it shouldn't look. Here’s one I prepared earlier:
Stance and guard — how it should not look.
There is more body area to hit when I don’t turn my front shoulder in.
I've lost most of the torque in my hips, so have less power to call on. This is what coaches call being “square on”. Tuck that phrase to the back of your mind. We’ll return to it a little later.
The flared elbows leave my body unprotected and also affect my ability to punch with any power.
Look at those hands. My ugly mug is about to get a lot uglier!
Knees are rigid and my feet are flat.
Balance is nonexistent as my feet are in a straight line.
Apart from that, not bad!
As I touched on earlier, there are different styles. Some boxers hold their hands low, others have a squarer stance.
These complex styles suit specific skills and attributes. They take time and practice to perfect. If you have the elite head movement and excellent defence of a prime Mike Tyson, you can stand squarer. If you have outrageous reflexes like Naseem Hamed you can get away with holding your hands low. For the rest of us mortals, I’d suggest sticking to the fundamentals for now.
Notes
The Akrotiri Boxer Fresco, discovered in 1967, depicts two boys wearing boxing gloves and belts. It dates back to 1600 BCE. You can clearly see that the boxers are using the stance we use today.